Very neat and useful configuration was recently announced at Oracle Cloud Infrastructure (OCI) blog as a part of Always Free tier. Unfortunately, as of July 2021, it’s still very complicated to launch an instance due to the “Out of Capacity” error. Here we’re solving that issue as Oracle constantly adds capacity from time to time.
Each tenancy gets the first 3,000 OCPU hours and 18,000 GB hours per month for free to create Ampere A1 Compute instances using the VM.Standard.A1.Flex shape (equivalent to 4 OCPUs and 24 GB of memory).
Starting from Oracle Cloud Infrastructure (OCI) CLI installation.
Quickstart
The installer script automatically installs the CLI and its dependencies, Python and virtualenv. Before running the…
On a Mac Computer you can also install the OCI cli with Brew.
brew install oci-cli jqGenerating API key
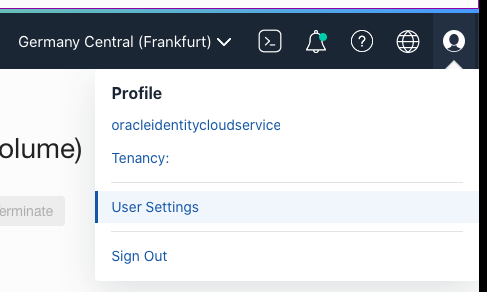
After logging in to OCI Console, click profile icon and then “User Settings”
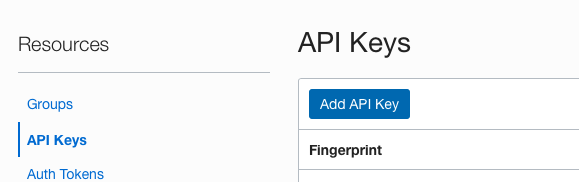
Go to Resources -> API keys, click “Add API Key” button
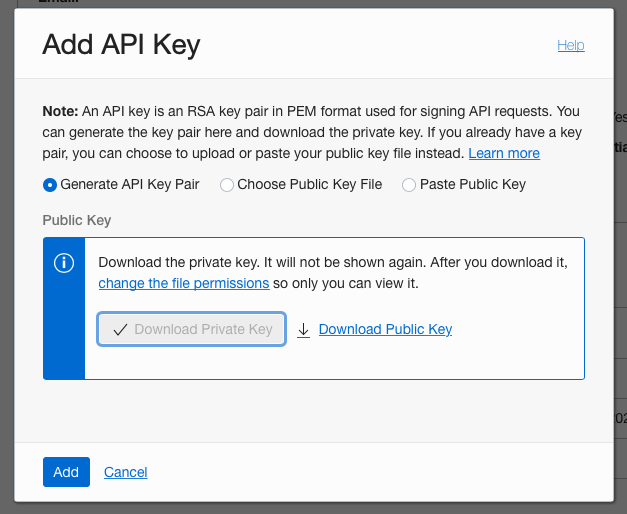
Make sure “Generate API Key Pair” radio button is selected, click “Download Private Key” and then “Add”.
Copy the contents from textarea and save it to file with a name “config”. I put it together with *.pem file in newly created directory $HOME/.oci
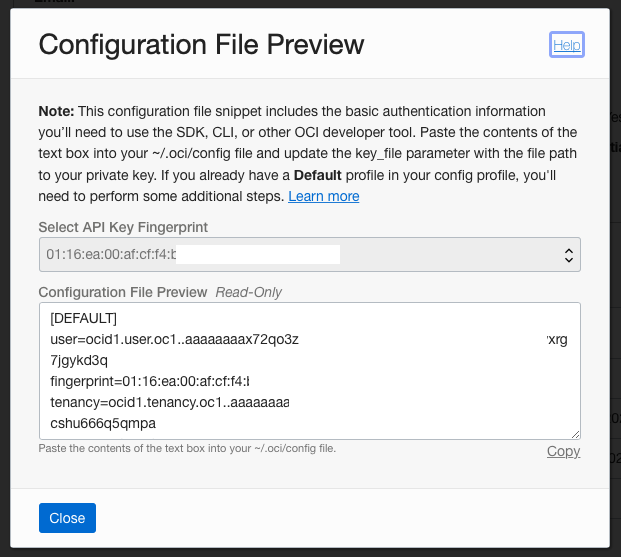
That’s all about the API key generation part.
Setting up CLI
Specify config location
OCI_CLI_RC_FILE=$HOME/.oci/configIf you haven’t added OCI CLI binary to your PATH, run
alias oci="$HOME/bin/oci"(or whatever path it was installed).
Set permissions for the private key
oci setup repair-file-permissions --file $HOME/.oci/oracleidentitycloudservice***.pemTest the authentication (user value should be taken from textarea when generating API key):
oci iam user get --user-id ocid1.user.oc1..aaaaaaaaa***123Output should be similar to:
{
  "data": {
    "capabilities": {
      "can-use-api-keys": true,
      "can-use-auth-tokens": true,
      "can-use-console-password": false,
      "can-use-customer-secret-keys": true,
      "can-use-db-credentials": true,
      "can-use-o-auth2-client-credentials": true,
      "can-use-smtp-credentials": true
    },
    "compartment-id": "ocid1.tenancy.oc1..aaaaaaaa***123",
    "db-user-name": null,
    "defined-tags": {
      "Oracle-Tags": {
        "CreatedBy": "scim-service",
        "CreatedOn": "2021-08-31T21:03:23.374Z"
      }
    },
    "description": "[email protected]",
    "email": null,
    "email-verified": true,
    "external-identifier": "123456789qwertyuiopas",
    "freeform-tags": {},
    "id": "ocid1.user.oc1..aaaaaaaaa***123",
    "identity-provider-id": "ocid1.saml2idp.oc1..aaaaaaaae***123",
    "inactive-status": null,
    "is-mfa-activated": false,
    "last-successful-login-time": null,
    "lifecycle-state": "ACTIVE",
    "name": "oracleidentitycloudservice/[email protected]",
    "previous-successful-login-time": null,
    "time-created": "2021-08-31T21:03:23.403000+00:00"
  },
  "etag": "121345678abcdefghijklmnop"
}
Acquiring launch instance params
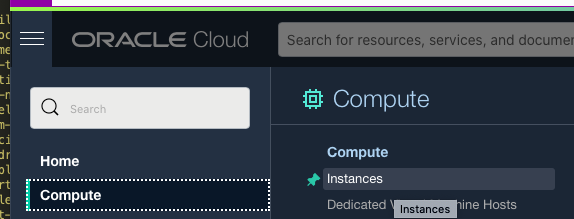
We need to know which Availability Domain is always free. Click Oracle Cloud menu -> Compute -> Instances
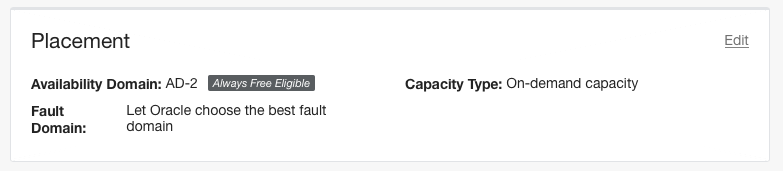
Click “Create Instance” and notice which one has “Always Free Eligible” label in Placement Section. In our case it’s AD-2.
Almost every command needs compartment-id param to be set. Let’s save it to COMPARTMENT var (replace with your “tenancy” value from the config file) then save the following under ~/bin/launch-instance:
#!/bin/bash -x
SSH_PUB_KEY_FILE="$HOME/.ssh/id_rsa.pub"
SSH_KEY=$(cat $SSH_PUB_KEY_FILE)
OCI_CLI="/opt/homebrew/bin/oci"
JQ="/opt/homebrew/bin/jq"
FLAG_FILE="$HOME/.oci/success"
if [[ -f "$FLAG_FILE" ]]; then
  echo "Already deployed!"
  exit 0
fi
# ARM
SHAPE=VM.Standard.A1.Flex

COMPARTMENT=ocid1.tenancy.oc1..aaaaaaaa**123

# Setup the oci profile using the following command:
#   oci session authenticate --region us-ashburn-1
HC="TEST"
PROFILE=DEFAULT
DISPLAY_NAME="$USER-$( date -I )-$RANDOM"
mkdir -p $HOME/.oci/hosts/
INSTANCE_INFO_FILE="$HOME/.oci/hosts/$DISPLAY_NAME"
AUTH_PARAMS="--profile $PROFILE"
#AUTH_PARAMS="--profile $PROFILE --auth security_token"

AD=$($OCI_CLI iam availability-domain $AUTH_PARAMS list --compartment-id $COMPARTMENT | $JQ -r ".data| .[0].name")
if [[ $? != 0 ]]; then
   echo "Could not determine AD.  You might need to reauthenticate"
   echo "oci session authenticate --region us-ashburn-1 $AUTH_PARAMS"
   exit 1
fi

SUBNET=$($OCI_CLI network subnet $AUTH_PARAMS list --compartment-id $COMPARTMENT | $JQ -r ".data| .[0].id")
if [[ $? != 0 ]]; then
   echo "Could not determine Subnet"
   exit 1
fi

IMAGE=$($OCI_CLI compute image $AUTH_PARAMS list --compartment-id=$COMPARTMENT --shape=$SHAPE | $JQ -r '[ .data[] | select(."operating-system" == "Oracle Linux") | select(."operating-system-version"|startswith("8"))] | .[0].id')
if [[ $? != 0 ]]; then
   echo "Could not determine Image"
   exit 1
fi
# export REQUESTS_CA_BUNDLE=/etc/ssl/certs/ca-bundle.crt
OCI_INFO=$($OCI_CLI $AUTH_PARAMS compute instance launch --shape $SHAPE \
   --availability-domain $AD \
   --compartment-id $COMPARTMENT \
   --image-id $IMAGE \
   --display-name $DISPLAY_NAME \
   --metadata "{ \"hostclass\": \"$HC\" }" \
   --subnet-id $SUBNET --shape-config "{ \"memoryInGBs\": 24.0, \"ocpus\": 4.0 }" \
   --ssh-authorized-keys-file $SSH_PUB_KEY_FILE \
)
if [[ $? != 0 ]]; then
   echo "Failed to deploy"
   exit 1
fi
echo $OCI_INFO > $INSTANCE_INFO_FILE
INSTANCE_ID=$($JQ -r '.data.id' < $INSTANCE_INFO_FILE)
if [[ -z $INSTANCE_ID ]]; then
   echo "Faild to read instance info from the file"
   exit 1
fi
while [[ -z "$INSTANCE_IP" ]]; do
  echo "Waiting 10s for the ip to be availible"
  sleep 10s
  INSTANCE_IP=$($OCI_CLI $AUTH_PARAMS compute instance list-vnics --instance-id $INSTANCE_ID | $JQ -r '.data[]."public-ip"')
done
if [[ ! -z $INSTANCE_IP ]]; then
echo "Updating the SSH config to include $DISPLAY_NAME"
cat >> ~/.ssh/config.d/custom < $FLAG_FILE
You can now setup crontab to run this script e.g. every minute by, saving this to $HOME/bin/launch-instance as a script file and making sure cron user is able to access private key. Some of the variables in the script might need to be updated to match your system. We won’t cover this part.
Output:
{
  "data": {
    "agent-config": {
      "are-all-plugins-disabled": false,
      "is-management-disabled": false,
      "is-monitoring-disabled": false,
      "plugins-config": null
    },
    "availability-config": {
      "is-live-migration-preferred": null,
      "recovery-action": "RESTORE_INSTANCE"
    },
    "availability-domain": "RCFH:US-ASHBURN-AD-1",
    "capacity-reservation-id": null,
    "compartment-id": "ocid1.compartment.oc1..aaaaaaaa***123",
    "dedicated-vm-host-id": null,
    "defined-tags": {},
    "display-name": "user-2023-01-30-22601",
    "extended-metadata": {},
    "fault-domain": "FAULT-DOMAIN-3",
    "freeform-tags": {},
    "id": "ocid1.instance.oc1.iad.adsfasfasdfasdfasdfasdf12323dfsag234",
    "image-id": "ocid1.image.oc1.iad.aaaaaaaa**123",
    "instance-options": {
      "are-legacy-imds-endpoints-disabled": false
    },
    "ipxe-script": null,
    "launch-mode": "PARAVIRTUALIZED",
    "launch-options": {
      "boot-volume-type": "PARAVIRTUALIZED",
      "firmware": "UEFI_64",
      "is-consistent-volume-naming-enabled": true,
      "is-pv-encryption-in-transit-enabled": false,
      "network-type": "PARAVIRTUALIZED",
      "remote-data-volume-type": "PARAVIRTUALIZED"
    },
    "lifecycle-state": "PROVISIONING",
    "metadata": {
      "hostclass": "Your-Hostclass",
      "ssh_authorized_keys": "ssh-rsa AAAAB3123432412343241234324123432412343241234324123432412343241234324123432412343241234324123432412343241234324123432412343241234324123432412343241234324/71ctthb1Ek= your-ssh-key"
    },
    "platform-config": null,
    "preemptible-instance-config": null,
    "region": "iad",
    "shape": "VM.Standard.A1.Flex",
    "shape-config": {
      "baseline-ocpu-utilization": null,
      "gpu-description": null,
      "gpus": 0,
      "local-disk-description": null,
      "local-disks": 0,
      "local-disks-total-size-in-gbs": null,
      "max-vnic-attachments": 2,
      "memory-in-gbs": 6.0,
      "networking-bandwidth-in-gbps": 1.0,
      "ocpus": 1.0,
      "processor-description": "3.0 GHz Ampere® Altra™"
    },
    "source-details": {
      "boot-volume-size-in-gbs": null,
      "boot-volume-vpus-per-gb": null,
      "image-id": "ocid1.image.oc1.iad.aaaaaaaas***123",
      "kms-key-id": null,
      "source-type": "image"
    },
    "system-tags": {},
    "time-created": "2023-01-30T19:13:44.584000+00:00",
    "time-maintenance-reboot-due": null
  },
  "etag": "123456789123456789123456789123456789123456789",
  "opc-work-request-id": "ocid1.coreservicesworkrequest.oc1.iad.abcd***123"
}
I believe it’s pretty safe to leave the cron running and check cloud console once per few days. Because when you’ll succeed, usually you won’t be able to create more instances than allowed — but start getting something like
{
    "code": "LimitExceeded",
    "message": "The following service limits were exceeded: standard-a1-memory-count, standard-a1-core-count. Request a service limit increase from the service limits page in the console. "
}
or (again)
{
    "code": "InternalError",
    "message": "Out of host capacity."
}
At least that’s how it worked for me. Just in case the script writes a file when it successfully deploys an instance. If the file is in place the script will not run again.
To verify the instance you can run the following.
oci compute instance list --compartment-id $CYou could also add something to check it’s output periodically to know when cron needs to be disabled. That’s not related to our issue here.
Assigning public IP address
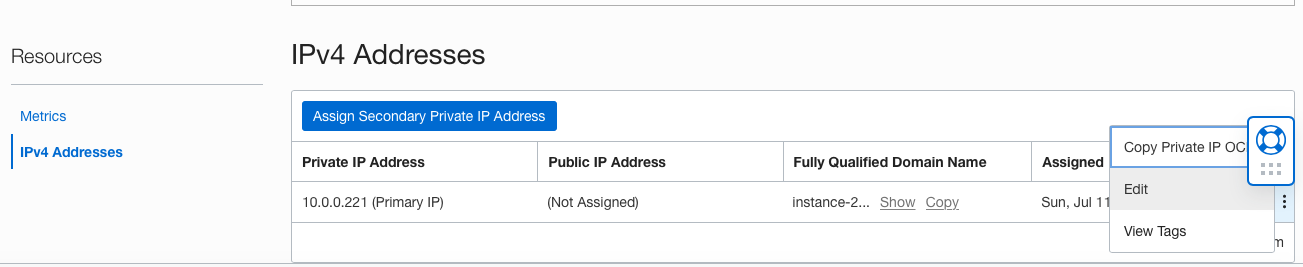
We are not doing this during the command run due to the default limitation (2 ephemeral addresses per compartment). That’s how you can achieve this. When you’ll succeed with creating an instance, open OCI Console, go to Instance Details -> Resources -> Attached VNICs by selecting it’s name

Then Resources -> IPv4 Addresses -> … -> Edit
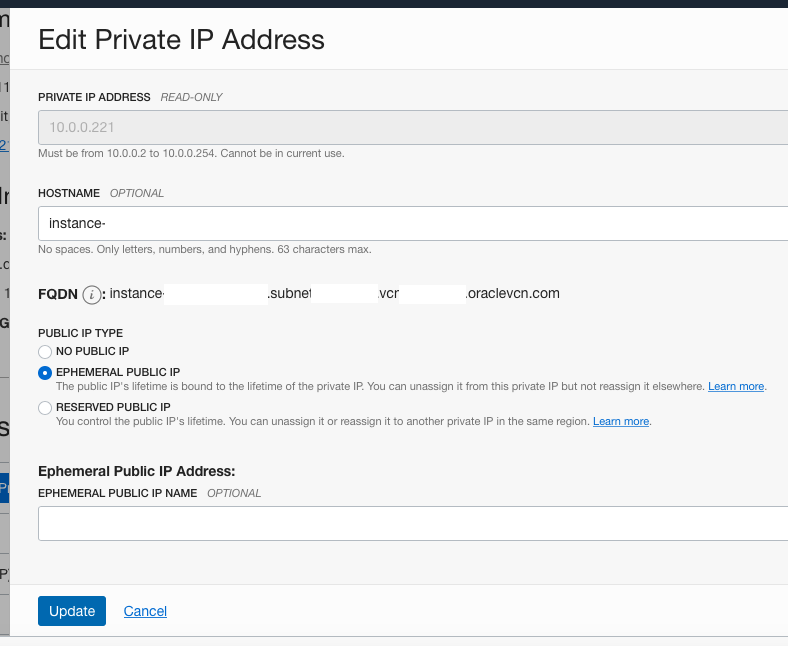
Choose ephemeral and click “Update”
Conclusion
That’s how you will login when instance will be created (notice opc default username)
ssh -i ~/.ssh/id_rsa [email protected]If you didn’t assign public IP, you can still copy internal FQDN or private IP (10.x.x.x) from the instance details page and connect from your other instance in the same VNIC. e.g.
ssh -i ~/.ssh/id_rsa [email protected]Thanks for reading!